FAQ
Here is the question and answer you selected:
 QUESTION:
How do I configure Dreamweaver?
ANSWER:
Once you have chosen Dreamweaver as your FTP client, you can use the following step by step guide to help you configure it with the proper settings.  Dreamweaver Setup Guide
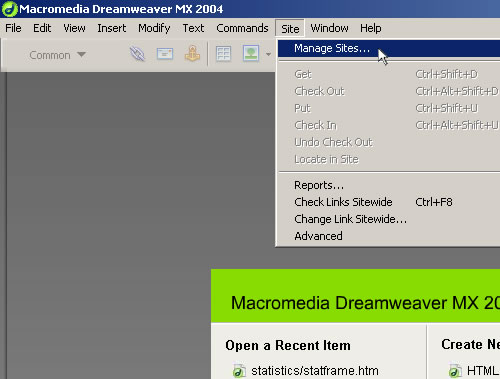
Settings for Advanced Users Server:Path: /yourdomain.com/html/ Username: yourdomain.com Password: your password Settings for Beginners  Open Dreamweaver and navigate to the "Site" drop down menu. Select "Manage Sites....".
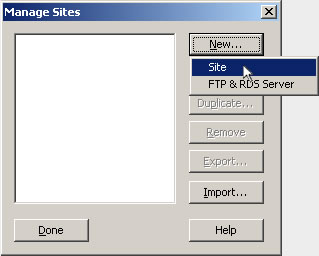
 Click on the "New" button and select "Site" from the drop-down menu.
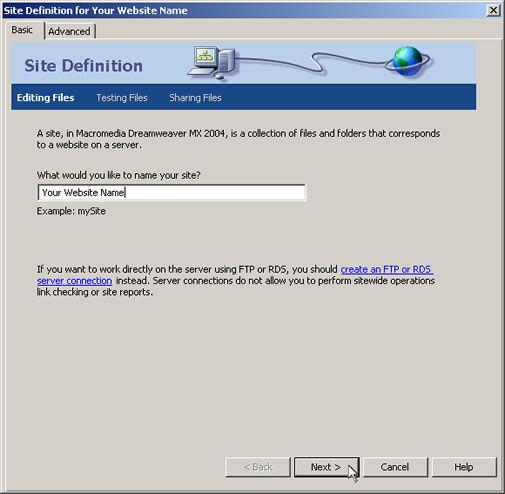
 Enter a name for your website, then click next.
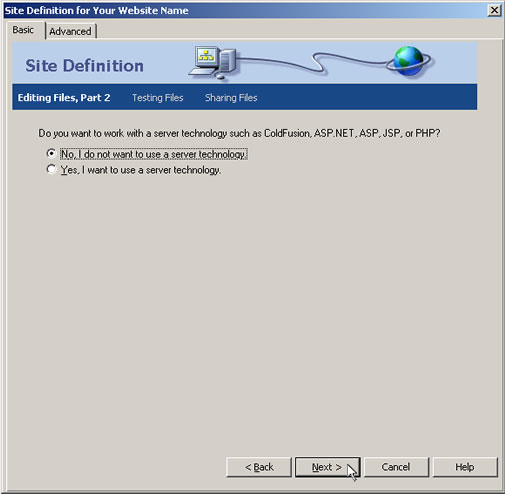
 Next, Dreamweaver will ask you if you would like to to work with a server technology. Select no, unless you plan to use one. Click next.
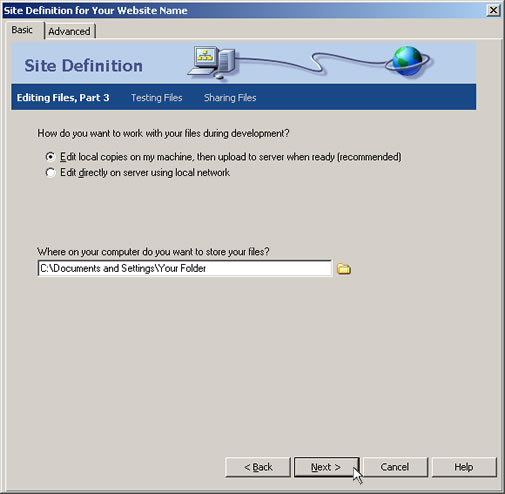
 Choose how you prefer to work with your files. Also choose where you would like to store your website on your hard drive. You can type it in the field or click on the folder icon to browse for your desired location.
Click next.
Choose how you prefer to work with your files. Also choose where you would like to store your website on your hard drive. You can type it in the field or click on the folder icon to browse for your desired location.
Click next.
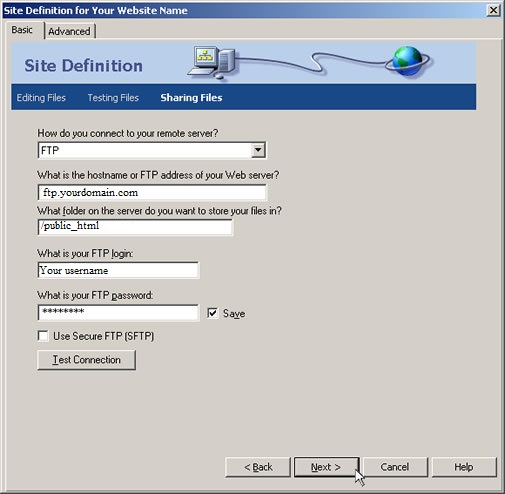
 Next select the first drop down menu, asking how you would like to connect to your remote server. Choose "FTP." Next, enter your hostname or FTP address, which is ftp.domainit.com. Select the the next field,
which is the folder on the server where you want to store your files. You need to enter "/yourdomain.com/html," substituting your actual domain name sans "www." Under that field enter "yourdomain.com", for your FTP login, also
substituting "yourdomain.com" for your actual domain name. Next enter your password, and either test your connection or click next.
Next select the first drop down menu, asking how you would like to connect to your remote server. Choose "FTP." Next, enter your hostname or FTP address, which is ftp.domainit.com. Select the the next field,
which is the folder on the server where you want to store your files. You need to enter "/yourdomain.com/html," substituting your actual domain name sans "www." Under that field enter "yourdomain.com", for your FTP login, also
substituting "yourdomain.com" for your actual domain name. Next enter your password, and either test your connection or click next.
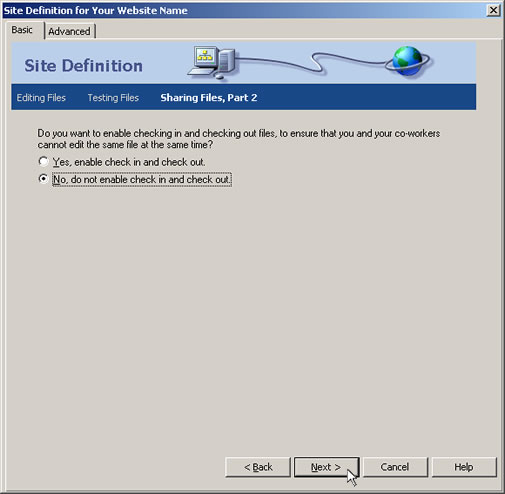
 Once you have clicked next, Dreamweaver will ask you if you would like to enable checking in and checking out files. This option is your choice. Click next after selecting an option.
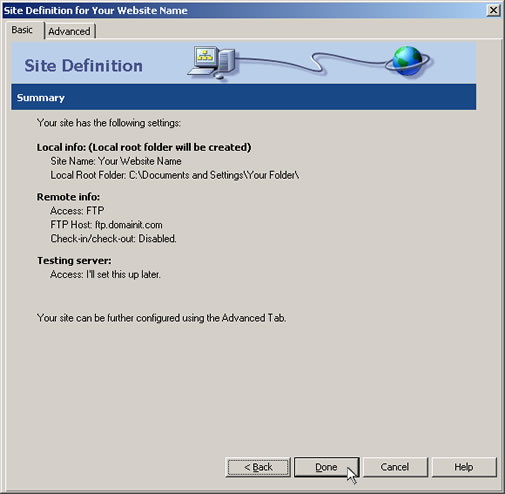
 Finally, you are ready to connect to your website. Click done.
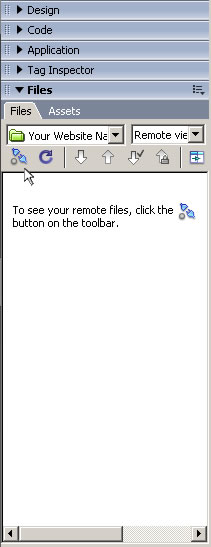
 To connect to your website, click on the remote host connection icon in the "Files" pane. If your "Files" pane is not open, you can open it by going up to the "Window" drop-down menu, and selecting "Files,"
or by pressing F8 on your keyboard.
To connect to your website, click on the remote host connection icon in the "Files" pane. If your "Files" pane is not open, you can open it by going up to the "Window" drop-down menu, and selecting "Files,"
or by pressing F8 on your keyboard.
RELATED LINKS:
|
||
DomainsRegister a DomainRenew a Domain Transfer a Domain Whois Privacy Bulk Search Whois Search |
ServicesWeb HostingSSL Certificates Web Marketing Website Tools |
CompanyAbout UsContact Us Support Testimonials Affiliate Program Coupon Savings |
Questions?For questions, comments or assistance visit our help desk at any time.Your Satisfaction is Our #1 Priority. |
Follow us:


|
 |
© Copyright 1996-2024 DomainIT. All rights reserved. Service Agreements